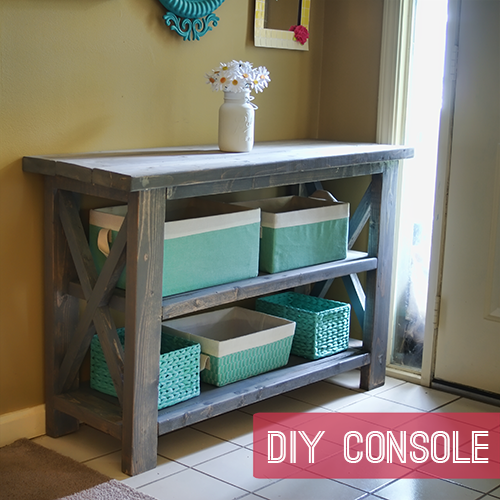
Here is the tutorial from Ana White.

We modified the dimensions since we wanted it to fit by our front door. We changed the width to 48'' and took out the center part. I came across this on pinterest and knew this was the color I wanted the console to be - dark walnut (I'm also wanting to do this in our house too….). I just love this dark wood color!

I was in charge of modifying the dimensions, assisting the wood cutter, sanding, wood conditioning & staining. Morgan was in charge of the wood cutting, pocket holes, assembling the table, fine sanding the assembled table, wood conditioning & staining.


Pretty fancy work table!
There's all of our wood!
My first sanding station (when we thought we could get away with sanding by hand haha).
Evan Norby - please note Morgan's fine muscles in this picture.
Pocket holes & assembling the table. Woodworking 101: We learned what a kreg jig is.
Yes those are 2 fine pocket holes. I learned some new terminology.
Carly showing you a pocket hole screw.
One side of the table complete.
Carly loved taking the screws out (trying to put them places) and then putting them back in the container.
I missed some steps because I was assisting the table assembler.
Now it just needs the X's on each side.
Carly was a big help. Great job stabilizing that table!
Morgan did some nice sanding on the top of the table - rounding the edges & corners.
Morgan's been doing some suntanning - just his face though.
Carly put on her own socks, can you tell?
The final step! Staining.
We are loving this!!! And contemplating our next piece of furniture… the floating shelves from above, a matching coffee table or end table? The possibilities are endless :)

2 comments:
Love it!!!! Way to go guys!
1. This makes me really wish we had a garage
2. Tell Morgan to wear sunscreen
3. Tell Carly I love her socks. Reminds me of Miss Autumn
4. Some of Carly's faces remind me of Autumn
5. It looks awesome and I say an end table
Post a Comment